Bauknecht BAK3S KN8V IN Betriebsanweisung
Stöbern Sie online oder laden Sie Betriebsanweisung nach Nein Bauknecht BAK3S KN8V IN herunter. Bauknecht BAR2S K8 V2 IN Setup and user guide [el] [en] [it] Benutzerhandbuch
- Seite / 8
- Inhaltsverzeichnis
- FEHLERBEHEBUNG
- LESEZEICHEN
Inhaltsverzeichnis
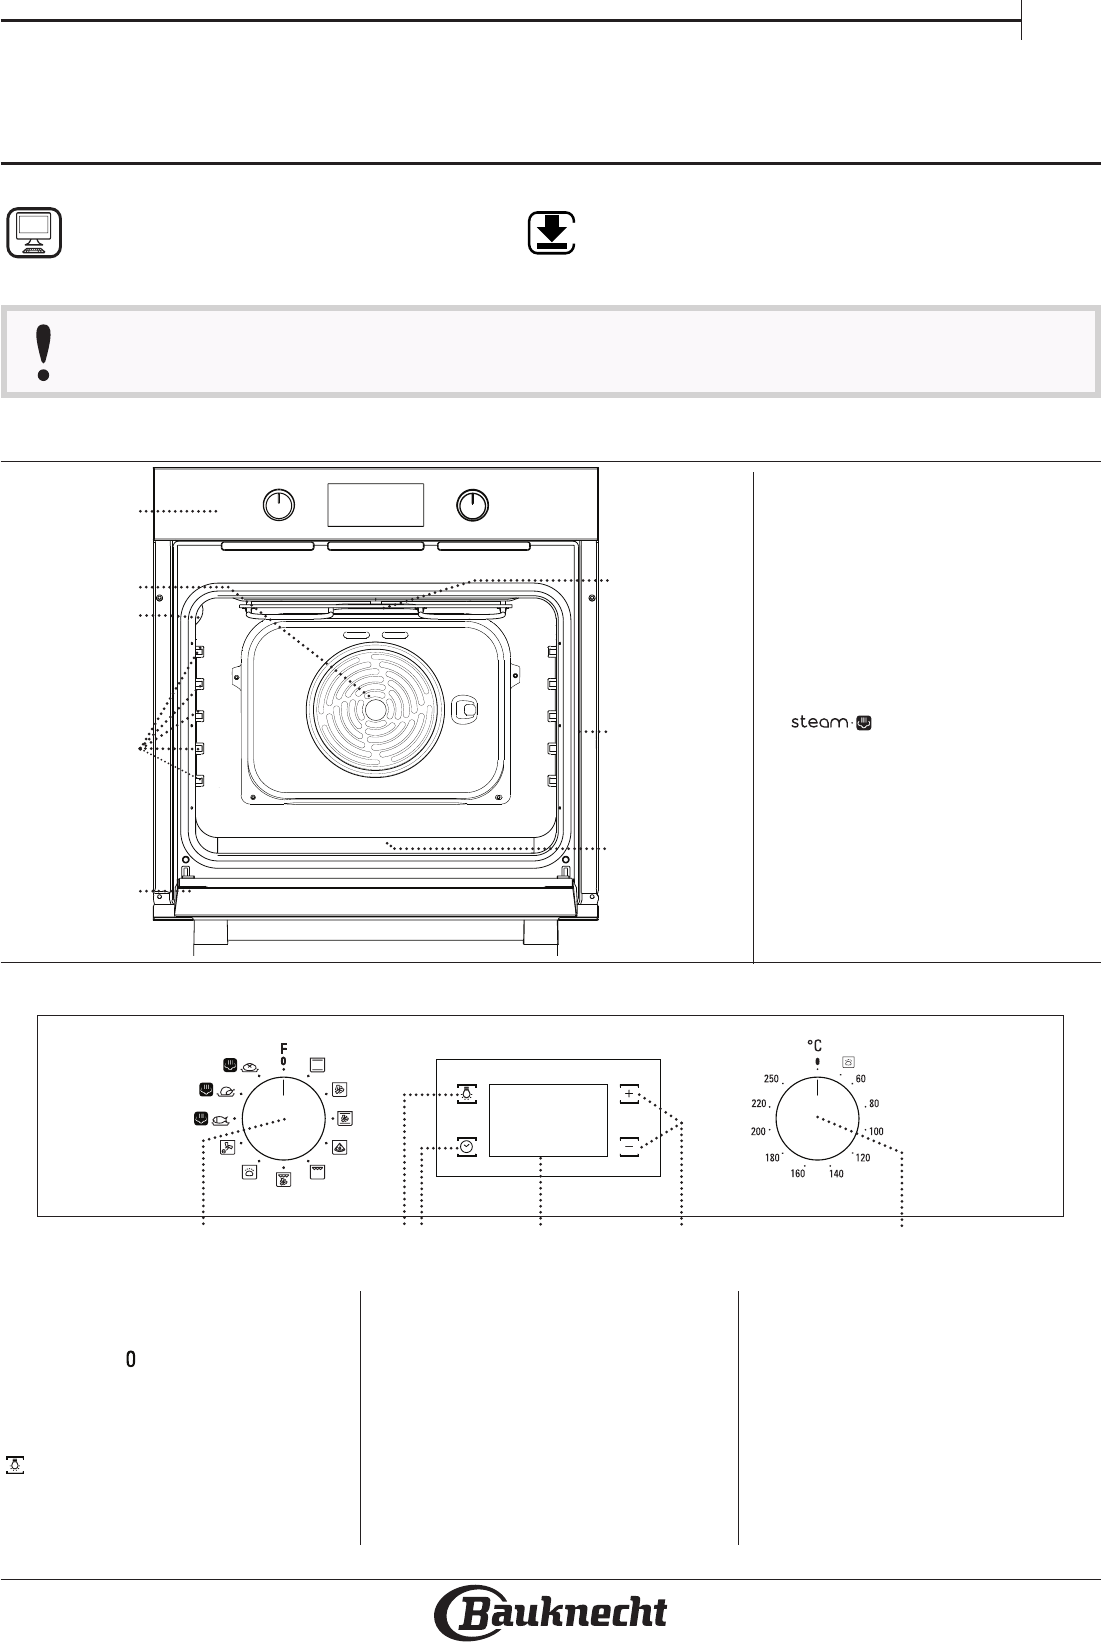
EN11. SELECTION KNOBFor switching the oven on by selecting a function.Turn to the position to switch the oven off.2. LIGHTWith the oven switched on,
2ACCESSORIESINSERTING THE WIRE SHELF AND OTHER ACCESSORIES• Insert the wire shelf onto the level you require by holding it tilted slightly upwards and
EN3FUNCTIONSCONVENTIONALFor cooking any kind of dish on one shelf only.FORCED AIRFor cooking different foods that require the same cooking temperature
43. PREHEATINGOnce the function starts, an audible signal and a flashing icon on the display indicate that the preheating phase has been activated.At
EN5RECIPE FUNCTION PREHEAT TEMPERATURE (°C) DURATION (Min) LEVEL AND ACCESSORIESLeavened cakesYes 170 30 - 503Yes 160 30 - 502 Yes 160 40 - 604
6RECIPE FUNCTION PREHEAT TEMPERATURE (°C) DURATION (Min) LEVEL AND ACCESSORIESSausages / kebabs / spare ribs / hamburgers- 250 15 - 30 *54Roast chicke
EN7CLEANING AND MAINTENANCEEXTERIOR SURFACESClean the surfaces with a damp microfibre cloth. If they are very dirty, add a few drops of pH-neutral det
8CLICK & CLEAN - CLEANING THE GLASS PANELS1. After removing the door and resting it on a soft surface with the handle downwards, simultaneously p
Weitere Dokumente für Nein Bauknecht BAK3S KN8V IN


Verwandte Produkte und Handbücher für Nein Bauknecht BAK3S KN8V IN
 (52 Seiten)
(16 Seiten)
(12 Seiten)
(52 Seiten)
(16 Seiten)
(12 Seiten)
 (8 Seiten)
 (4 Seiten)
(8 Seiten)
(4 Seiten)
(8 Seiten)
 (9 Seiten) (16 Seiten)
(8 Seiten)
(9 Seiten) (16 Seiten)
(8 Seiten)
© 2020, manymanuals.de. Alle Rechte vorbehalten. | 0.224 s |
 Manymanuals.com
 Manymanuals.de
 Manymanuals.fr
 Manymanuals.it
 Manymanuals.pl
 Manymanuals.cz
 Manymanuals.es
 Manymanuals-pt.com
Kommentare zu diesen Handbüchern